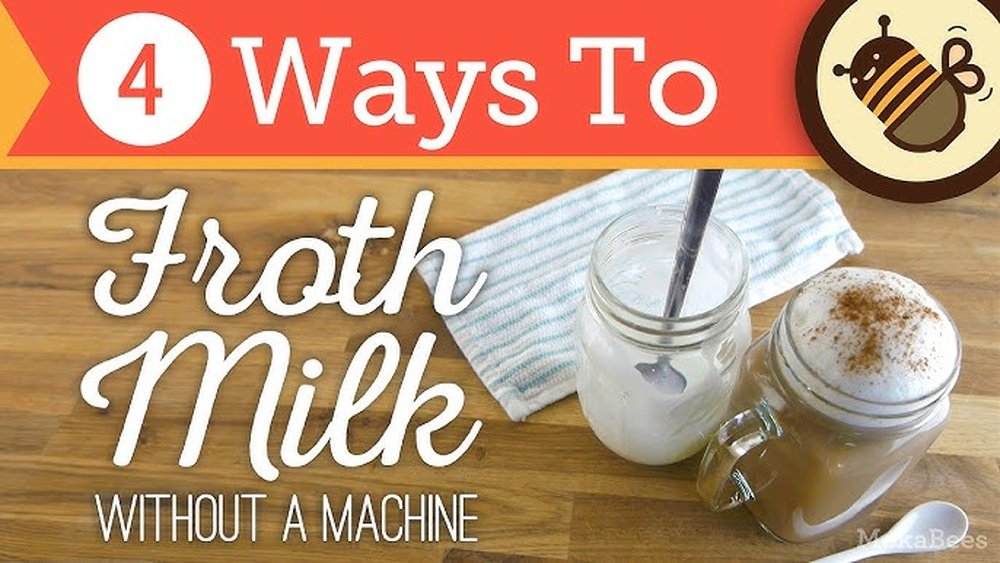
Want to enjoy creamy, frothy milk with your coffee but don’t have a fancy machine? You’re not alone.
Many people think frothing milk at home requires special equipment, but that’s simply not true. With a few simple tricks and everyday kitchen tools, you can create rich, velvety foam that rivals your favorite café’s. Imagine sipping your morning latte, knowing you made it yourself—without spending a dime on expensive gear.
Keep reading, and you’ll discover easy, step-by-step methods to froth milk perfectly every time, right in your own kitchen. Your coffee routine is about to get a delicious upgrade!
Milk Frothing Basics
Frothing milk at home without a machine is simple. It only needs the right technique and a few tools. Understanding milk frothing basics helps create creamy foam for coffee or tea. Warm milk and air combine to form froth, which adds texture and taste.
Different types of milk froth differently. Whole milk gives thick, creamy foam. Skim milk creates light, airy foam. Knowing these facts helps choose the best milk for your drink.
Milk with higher fat creates richer froth. Whole milk is best for dense, creamy foam. Low-fat milk makes lighter foam with bigger bubbles. Non-dairy milk like almond or oat milk can froth too, but results vary.
Heating Milk Properly
Heat milk between 140°F and 150°F for best froth. Too hot milk loses sweetness and burns easily. Use a thermometer or warm milk on low heat. Warm milk helps trap air and creates stable foam.
Introducing Air Into Milk
Froth forms when air mixes with warm milk. Whisking or shaking milk adds tiny air bubbles. These bubbles make milk fluffy and light. The goal is to create smooth foam, not big bubbles.
Tools For Frothing Without A Machine
Use a jar with lid, whisk, or French press to froth milk. A small hand mixer or blender works well too. These tools help mix air into milk quickly and easily.
Choosing The Right Milk
Choosing the right milk makes a big difference in frothing milk at home. Different types of milk create different textures and foam quality. Some milk froths thick and creamy, while others produce light, airy bubbles. Knowing which milk to pick helps you get the best froth without a machine.
Whole Milk For Creamy Froth
Whole milk has more fat, which creates rich and creamy foam. The fat helps bubbles stick together and last longer. This milk type is perfect for lattes and cappuccinos. It heats well and tastes smooth in coffee.
Low-fat And Skim Milk For Light Froth
Low-fat and skim milk have less fat, so they produce lighter foam. Their bubbles are bigger and more airy. This milk is good if you want a less creamy texture. It froths quickly but may not last as long.
Plant-based Milks And Frothing
Almond, soy, oat, and coconut milk can froth too. Some plant-based milks froth better than others. Oat milk often creates thick foam, while almond milk makes lighter bubbles. Look for barista versions of plant milks for better froth.
Milk Temperature And Froth Quality
Warm milk froths easier than cold milk. Heat milk to about 140°F (60°C) for best results. Avoid boiling, or the milk will taste burnt. Warm milk helps create stable bubbles and smooth foam.
Ideal Milk Temperature
Milk froths best between 140°F and 150°F. Warmer milk creates creamier foam, while hotter milk can burn. Aim for this range to get smooth, rich froth without a machine.
Heating milk to the right temperature is key for perfect froth. Milk that is too cold won’t froth well. Milk that is too hot loses its sweetness and can burn.
The ideal range is between 140°F and 155°F (60°C to 68°C). This temperature lets proteins and fats create smooth, creamy foam. It also keeps the milk’s natural sweetness.
Why Temperature Matters For Frothing
Milk proteins change structure with heat. At the ideal temperature, they trap air to form stable bubbles. Cold milk creates weak foam that disappears fast. Hot milk breaks down proteins, causing poor texture.
How To Check Milk Temperature Without A Thermometer
Use your hand to feel the milk’s warmth. Stop heating when the container feels hot but not too hot to touch. Another way is to heat milk for about 30-45 seconds in the microwave. This usually reaches the right temperature.
Tips For Heating Milk Safely
Heat milk slowly to avoid burning. Stir gently while warming to spread heat evenly. Avoid boiling milk because it changes flavor and texture. Warm milk steadily and watch closely for best results.
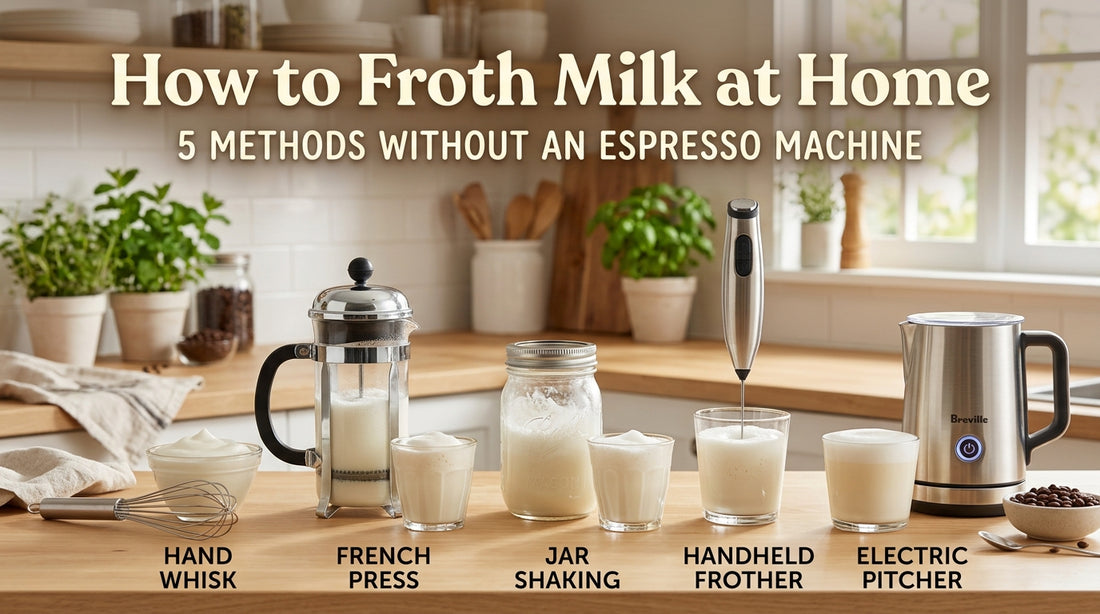
Frothing With A Jar
Frothing milk at home without a machine can be simple and fun. One easy way is frothing with a jar. This method uses items you already have in your kitchen. It creates creamy, foamy milk perfect for coffee, lattes, or hot chocolate.
The jar method requires only a jar with a lid and some warm milk. You can froth milk anywhere, anytime, with no special tools or electricity. It is quick and effective for small amounts of milk.
Choose The Right Jar
Pick a clean jar that holds at least twice the amount of milk you want to froth. A glass jar works best. Make sure it has a tight-fitting lid to avoid spills.
Warm The Milk
Heat the milk until it is warm but not boiling. Aim for about 140°F (60°C). Warm milk froths better and tastes sweeter.
Pour And Shake
Pour the warm milk into the jar. Screw the lid on tightly. Shake the jar vigorously for 30 to 60 seconds. You will see the milk double in volume and become frothy.
Let The Froth Settle
Remove the lid and let the jar sit for 30 seconds. This allows the foam to stabilize and thicken. Spoon the frothy milk onto your coffee or drink.
Using A French Press
Using a French press to froth milk at home is simple and effective. This method creates creamy, airy foam without any special machine. The French press is a common kitchen tool, making it accessible for many coffee lovers.
It works by using a plunger to pump air into the milk. This action creates the froth needed for lattes, cappuccinos, and other coffee drinks. The process is quick and requires only a few steps.
Whole milk froths best because of its fat content. You can also use 2% or skim milk, but the foam will be lighter. For non-dairy options, almond or oat milk works well.
Heating The Milk
Warm the milk before frothing. Heat it to about 140°F (60°C). Avoid boiling the milk, as it can lose flavor and texture. Use a microwave or stovetop for gentle heating.
Frothing Process With A French Press
Pour the warm milk into the French press. Fill it only halfway to leave room for froth. Pump the plunger up and down vigorously for 20-30 seconds. Stop when the milk has doubled in volume and looks creamy.
Using The Frothed Milk
Tap the French press gently on the counter to remove large bubbles. Pour the frothy milk slowly over your coffee. Hold back the foam with a spoon to pour liquid milk first, then top with foam.
Whisk Frothing Method
Whisking milk by hand can create a creamy foam without special tools. Simply heat milk, then whisk vigorously until frothy bubbles form. This easy method works well for lattes or cappuccinos at home.
What Is The Whisk Frothing Method?
The whisk frothing method uses a simple kitchen whisk to create foam. It works by whipping air into warm milk. This makes the milk light and creamy. You do not need special tools or machines.
This method is perfect for those who want quick froth. It is easy and affordable. All you need is a bowl and a whisk.
How To Froth Milk With A Whisk
First, heat the milk until it is warm but not boiling. About 140°F (60°C) is best. Pour the warm milk into a deep bowl.
Hold the whisk firmly and move it quickly up and down. Whisk for about 30 seconds or until foam forms. You will see bubbles and the milk will get thicker.
Stop whisking once you see a good amount of foam on top. Tap the bowl gently on the counter to remove big bubbles.
Tips For Better Frothing Results
Use fresh milk with higher fat content for creamier foam. Whole milk or 2% works well. Cold milk froths better than warm milk, so start cold and warm it slightly after whisking.
Choose a whisk with thin wires for faster frothing. Avoid using a flat whisk as it traps less air.
Whisk quickly but steadily to create more bubbles. Slow whisking will not create enough foam.
Blender Frothing Technique
The blender frothing technique offers a quick and easy way to froth milk at home without special tools. It uses common kitchen equipment that many people already have. This method creates creamy, airy milk perfect for coffee or hot chocolate. The blender’s high speed mixes air into the milk, making light foam.
This technique works well with whole milk, 2%, or non-dairy milk like almond or oat. Warm the milk first for best results. The blender frothing method saves time and effort while giving a smooth texture. It’s a simple way to enjoy café-style drinks at home.
Preparing The Milk For Blending
Start by heating the milk to 140°F (60°C). Use a microwave or stovetop to warm it gently. Avoid boiling the milk as it can change the taste. Warm milk froths better and holds foam longer. Pour the milk into the blender jar, filling it halfway to leave room for air.
Blending Milk To Create Foam
Secure the blender lid tightly to avoid spills. Blend the milk on high speed for 30 to 60 seconds. Watch as the milk starts to foam and increase in volume. Stop blending once you see thick foam forming. Do not over-blend or the foam may collapse.
Using The Frothed Milk
Let the milk sit for a few seconds to stabilize the foam. Pour the milk slowly into your coffee or tea. Use a spoon to hold back the foam while pouring liquid milk. Then spoon the foam on top for a creamy finish. Enjoy the rich texture and smooth taste.

Credit: www.thepioneerwoman.com
Hand Mixer Frothing
Hand mixer frothing offers a simple way to create creamy milk foam at home. This method does not require special machines. It uses a common kitchen tool that many already have. The hand mixer quickly whips air into warm milk, making a light and airy froth. This technique works well for lattes, cappuccinos, and other coffee drinks.
The process is fast and easy. It allows control over the froth’s thickness. Using a hand mixer saves time and effort compared to manual whisking. It also creates a smooth texture that blends nicely with coffee or tea. This method suits those who want café-style drinks without extra gadgets.
Choosing The Right Milk For Frothing
Whole milk produces rich and creamy foam. Low-fat milk creates lighter froth with larger bubbles. Non-dairy milks like almond or oat can froth but may vary in texture. Use fresh, cold milk for best results. Heating milk before frothing helps create stable foam.
Preparing The Milk For Frothing
Heat milk gently to about 140°F (60°C). Avoid boiling or overheating, which breaks down proteins. Warm milk froths better and tastes sweeter. Use a microwave or stovetop for heating. Pour the milk into a tall, narrow container before mixing.
Frothing Milk With A Hand Mixer
Insert the beaters into the milk. Start mixing on low speed to avoid splashing. Gradually increase to medium-high speed. Move the mixer up and down gently to incorporate air evenly. Froth for about 30 to 60 seconds until the milk doubles in volume. Stop once foam forms and the texture is smooth.
Tips For Best Frothing Results
Use a deep bowl or jar to prevent spills. Avoid over-frothing, which can cause foam to collapse. Clean the beaters immediately after use to prevent milk residue. Experiment with mixing speeds and times to find your preferred texture. Use fresh milk for consistent foam quality.
Immersion Blender Method
The immersion blender method offers a quick way to froth milk at home. It uses a simple hand blender to create creamy, airy foam. This method suits those without special frothing machines.
Immersion blenders are easy to find and simple to use. They blend and aerate milk fast, producing a smooth froth for coffee or hot chocolate. The process requires little effort and no extra tools.
Preparing The Milk
Start by heating the milk to around 150°F (65°C). Warm milk froths better and tastes sweeter. Avoid boiling, as it can change the flavor and texture.
Use fresh milk with at least 2% fat for best results. Whole milk creates richer foam, but low-fat also works well.
Using The Immersion Blender
Pour the warm milk into a tall, narrow container. Insert the immersion blender just below the surface of the milk. Turn it on and move it up and down gently.
Blend for about 20 to 30 seconds until the milk grows frothy and doubles in volume. Avoid over-blending to prevent large bubbles.
Tips For Perfect Froth
Hold the blender steady to avoid splashing. Use a container tall enough to hold the milk and foam. Clean the blender immediately to keep it working well.
For thicker foam, blend a bit longer or use whole milk. For lighter foam, reduce blending time or choose low-fat milk.
Credit: instacuppastore.com
Manual Hand Pump Frothing
Manual hand pump frothing offers a simple way to create creamy milk foam. It does not require electricity or complex tools. This method fits perfectly for anyone without a frothing machine.
Using a hand pump frother is straightforward and effective. It uses air pressure to mix air into the milk, creating light and fluffy foam. This tool is small, portable, and easy to clean, making it ideal for home use.
What You Need For Manual Hand Pump Frothing
Start with fresh cold milk and a hand pump frother. Choose milk with higher fat content for richer foam. Whole milk or 2% works best. Have a microwave or stove ready to warm the milk.
Step-by-step Guide To Froth Milk By Hand Pump
Pour warm milk into the frother, leaving space for foam. Pump the handle up and down steadily for about 20 to 30 seconds. Watch the milk expand as air mixes in. Stop when foam doubles in volume and feels thick.
Tips For Better Foam Using A Hand Pump
Warm milk to about 140°F for best results. Avoid overheating to prevent burning the milk. Use cold milk to start for easier frothing. Clean the frother parts after each use to maintain performance.
Tips For Creamier Foam
Creating creamier foam at home is easy using simple tools like a jar or whisk. Warm milk gently and whisk vigorously to trap air for smooth, rich froth. Using whole milk or adding a little cream helps make the foam thicker and silkier.
Creating creamy foam at home is easier than it seems. The right technique and small details make a big difference. Simple steps can help you get smooth and thick milk foam without a machine.
Focus on milk type, temperature, and frothing method. These factors improve foam texture and taste. Follow these tips to enjoy coffee shop quality foam at home.
Read more: Best Milk for Frothing: Top Picks for Perfect Coffee Foam
Choose Whole Milk Or 2% Milk
Whole milk or 2% milk creates the creamiest foam. They have the right fat content to make foam thick and smooth. Skim or low-fat milk can create foam but it will be lighter and less creamy.
Heat Milk To The Right Temperature
Warm milk froths better. Heat milk to about 140°F (60°C). Avoid boiling. Too hot milk will lose sweetness and can taste burnt. Use a thermometer or warm until it feels hot but not too hot to touch.
Use Fresh, Cold Milk
Start with fresh milk straight from the fridge. Cold milk froths better and holds foam longer. Warm milk or old milk will not create good foam and may taste sour.
Froth In Small Batches
Froth small amounts of milk for better foam. About 1/3 to 1/2 cup works well. Large amounts are harder to froth evenly. Smaller batches create more stable and creamy foam.
Use A Clean Container
Clean jars or bowls help foam form better. Any grease or dirt can stop milk from frothing properly. Use a glass or metal container for best results.
Froth With Quick, Strong Movements
Shake, whisk, or stir milk quickly and strongly. This traps air and builds foam. Consistent speed helps form small, even bubbles for smooth foam. Avoid slow or weak frothing.
Tap And Swirl Foam To Remove Large Bubbles
After frothing, tap the container gently on the counter. This breaks big bubbles. Swirl milk to mix foam and milk. This creates a creamy and velvety texture.
Avoiding Common Mistakes
Frothing milk at home without a machine can be simple. Avoiding common mistakes improves your results. Small errors can ruin texture and taste. Knowing what to skip helps you get fluffy, creamy froth every time.
Pay attention to temperature, technique, and tools. These details make a big difference in homemade froth quality. Below are key mistakes to avoid for better milk frothing.
Use The Right Milk Temperature
Milk should be warm but not hot. Heating above 150°F can burn milk and stop froth from forming. Use a thermometer or warm milk until it feels hot but not boiling. Cold milk froths less well, so avoid skipping this step.
Avoid Over-shaking Or Over-whisking
Shaking or whisking too long breaks down foam. Stop as soon as you see thick bubbles forming. Froth should be light and airy, not watery or flat. Overdoing it wastes effort and milk.
Choose The Right Container
Use a jar or bowl with enough space for milk to expand. Crowded containers spill or reduce froth volume. A tall jar with a lid works best for shaking methods. Clean containers also help keep foam fresh.
Read more: Best Espresso Machine With Grinder: Top Picks for 2026
Do Not Use Low-fat Or Skim Milk
Whole or 2% milk froths better due to higher fat content. Low-fat milk creates thin, weak foam. For rich, creamy froth, avoid skim milk. Higher fat milk holds bubbles longer and tastes better.
Keep Tools Clean And Dry
Dirty or wet tools stop foam from forming properly. Rinse whisks, jars, or presses before use. Any leftover residue can deflate bubbles. Clean tools make frothing easier and the foam more stable.
Storing And Reheating Frothed Milk
Frothed milk adds a creamy texture and rich taste to your coffee at home. Sometimes you make more than you need. Storing and reheating frothed milk properly keeps its flavor and texture fresh. It helps avoid waste and saves time for your next cup.
Frothed milk contains air bubbles that give it a light, fluffy feel. These bubbles can break down quickly if not stored right. Cool the milk soon after frothing and keep it in a sealed container in the fridge. Use it within 24 hours for best taste.
How To Store Frothed Milk
Use a clean, airtight container to store frothed milk. Glass jars or small bottles work well. Fill the container but leave some space for the milk to expand. Seal tightly to prevent the milk from absorbing fridge odors. Store the container in the coldest part of your refrigerator.
Best Practices For Reheating Frothed Milk
Reheat frothed milk gently to keep its creamy texture. Use a microwave on low power or warm it on the stove over low heat. Stir gently but avoid vigorous whisking. Overheating breaks the bubbles and makes the milk flat. Heat only until warm, not hot.
Tips To Refresh Reheated Frothed Milk
After reheating, the froth may lose some volume. Whisk the milk lightly with a small whisk or fork. This adds back some air and fluffiness. Avoid shaking the container hard; it can cause bubbles to collapse. Use the milk soon after refreshing for the best texture.
Using Froth For Different Drinks
Frothing milk enhances many drinks like lattes, cappuccinos, and hot chocolate. Simple tools such as a jar or whisk create creamy foam without a machine. This easy technique adds smooth texture and rich flavor to your homemade beverages.
Cleaning up after frothing milk is simple and quick. It helps keep your kitchen neat and your tools ready for next time. Milk can dry fast and become sticky if not cleaned right away.
Rinse your frothing tool or container with warm water immediately after use. This stops milk residue from hardening. Use mild soap to wash all parts thoroughly. Avoid harsh scrubbing to protect your equipment.
Washing Different Frothing Tools
Whisks, jars, and French presses all need careful cleaning. For whisks, rinse under warm water and scrub gently with a brush. Jars can be soaked in warm soapy water before rinsing. French presses require disassembly for full cleaning.
Hand mixers and blenders should be unplugged before cleaning. Remove detachable parts and wash them separately. Wipe the main body with a damp cloth only. This prevents damage to the electrical parts.
Read more: Best Super Automatic Espresso Machines: Top Picks for Easy Brewing
Drying And Storing Your Equipment
After washing, dry all tools with a clean towel or let air dry. Make sure no moisture remains inside jars or containers. Store tools in a dry place to avoid mold and odors.
Keeping your frothing tools clean extends their life. It also keeps your milk tasting fresh and pure every time you froth.
Frequently Asked Questions
Is There Any Way To Froth Milk Without A Frother?
Yes, froth milk without a frother by shaking warm milk in a jar, whisking vigorously, or using a French press to create foam.
Is There A Way To Manually Froth Milk?
Yes, you can manually froth milk by shaking warm milk in a jar or using a French press to pump air into it.
Does Steaming Milk Help Lactose Intolerance?
Steaming milk breaks lactose into simpler sugars, making it taste sweeter but does not reduce lactose intolerance symptoms.
How Do You Froth Milk Without Equipment?
Pour warm milk into a jar or French press, fill halfway. Shake vigorously or pump the plunger until frothy. Scoop foam onto coffee.
How Can I Froth Milk At Home Without A Machine?
You can froth milk using a jar, whisk, or French press by shaking or stirring it vigorously. Warm the milk first for better foam.
Conclusion
Frothing milk at home without a machine is simple and fun. You only need common kitchen tools like a jar, whisk, or French press. Warm the milk just right for the best foam. Practice a few times to find your favorite method.
Enjoy creamy coffee drinks anytime, without extra gadgets. Small steps bring big joy to your coffee routine. Try these easy tips and savor your homemade froth today.
Read more: Best Prosumer Espresso Machine: Top Picks For Home