Ready to create a cutting board that’s truly your own? Whether you want a stylish kitchen centerpiece or a practical surface for meal prep, making a cutting board yourself is easier than you think.
You’ll learn how to select the right wood, join strips for a beautiful pattern, and finish it so it’s safe and durable. By the end, you’ll have a custom board that’s both functional and a great conversation starter. Keep reading, and let’s get started on a project you’ll be proud to show off every day.

Credit: www.youtube.com
Choose The Right Wood
Select dense hardwoods like maple, walnut, or cherry for a durable cutting board. These woods resist knife marks and are safe for food use. Avoid soft or porous wood to ensure longevity and hygiene.
Making a cutting board starts with choosing the right wood. The wood must be strong and safe for food contact. Hardwoods like maple, walnut, and cherry are great choices. They resist cuts and dents well. Soft woods can get damaged quickly and trap bacteria.
Pick wood that feels smooth and has tight grain. Tight grain means fewer gaps for germs. Avoid woods with strong odors or toxic properties. Some woods can change the taste of food or cause allergies.
Hardwood Types Suitable For Cutting Boards
Maple is a popular choice for cutting boards. It is hard, durable, and light in color. Walnut offers a dark, rich tone and is also very tough. Cherry wood has a warm, reddish shade and ages beautifully over time. These woods wear well and are food safe.
Avoid Toxic Or Soft Woods
Some woods are unsafe for cutting boards. Woods like pine, cedar, or oak are softer or contain chemicals. They can absorb moisture and develop bacteria. Pine dents easily and cedar smells strong. Oak has open grain that traps food particles.
Wood Grain And Board Durability
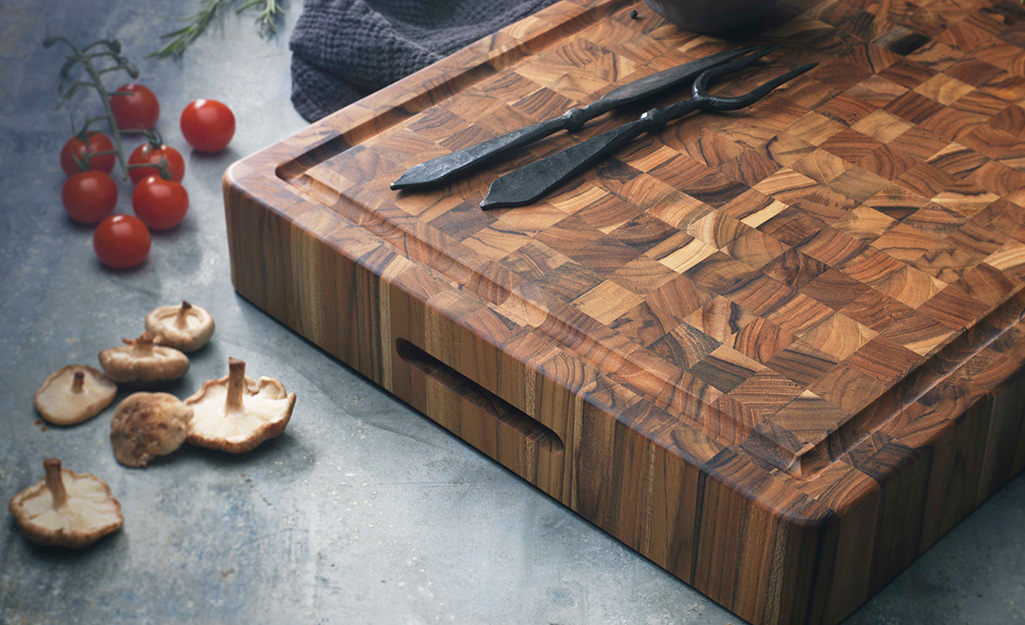
Wood grain affects how the board holds up. End grain boards last longer and are easier on knives. Edge grain boards are simpler to make and still durable. Flat grain boards show more wear and tear. Choose grain type based on skill and board use.
Consider Wood Availability And Cost
Some hardwoods cost more than others. Maple is affordable and widely available. Walnut and cherry may cost more but add beauty. Choose wood that fits your budget and local availability. Use quality wood to ensure a lasting cutting board.
Gather Essential Tools
Gathering the right tools is the first step to making a quality cutting board. Having essential tools ready makes the process smoother and safer. This section covers the basic tools needed for this woodworking project.
Wood Selection And Preparation Tools
Choose hardwood like maple, walnut, or cherry for durability and food safety. Use a saw to cut lumber into strips. A planer or jointer helps to smooth and flatten the wood surfaces. These tools prepare your wood for assembly.
Measuring And Marking Tools
Accurate measurements ensure your cutting board fits your needs. Use a tape measure or ruler to mark wood dimensions. A pencil or marking knife provides clear, precise lines. These tools guide your cuts and assembly.
Cutting And Shaping Tools
A table saw or circular saw cuts wood strips to size. A miter saw helps with angled cuts if you want patterns. Sandpaper or an orbital sander smooths edges and surfaces. Proper cutting tools create clean, straight cuts.
Assembly And Clamping Tools
Use food-safe wood glue to join wood strips. Clamps hold pieces tightly while the glue dries. Bar clamps or pipe clamps work well for this task. Strong clamping ensures a solid, seamless cutting board.
Finishing Tools
Sanding blocks or power sanders finish the surface with fine grit sandpaper. Apply food-grade mineral oil or beeswax with a clean cloth. These tools and materials protect the wood and enhance its look.
Prepare Wood Strips
Cut wood strips evenly to create a smooth surface for your cutting board. Sand each strip to remove rough edges before gluing. Proper preparation ensures a strong, lasting board.
Select hardwoods like maple, walnut, or cherry. These woods resist cuts and stay durable. Avoid softwoods because they dent easily. Hardwood also looks beautiful on your finished board.
Cut Strips To Size
Use a table saw to rip your wood into strips. Aim for equal widths, usually between 1 and 2 inches. Keep your cuts straight for a tight fit later. Consistency helps the board look neat and professional.
Check For Defects
Inspect each strip for cracks, knots, or warping. Remove any damaged sections. Defects weaken the board and may cause it to break. Smooth, clean strips ensure a strong cutting surface.
Sand The Edges
Lightly sand the edges of each strip. This removes splinters and rough spots. It also improves glue adhesion during assembly. Use medium-grit sandpaper for this step.
Credit: www.fouroakscrafts.com
Design Your Pattern
Designing your cutting board pattern sets the tone for the entire project. It shapes the look and feel of the board. A well-planned pattern makes your cutting board unique and appealing.
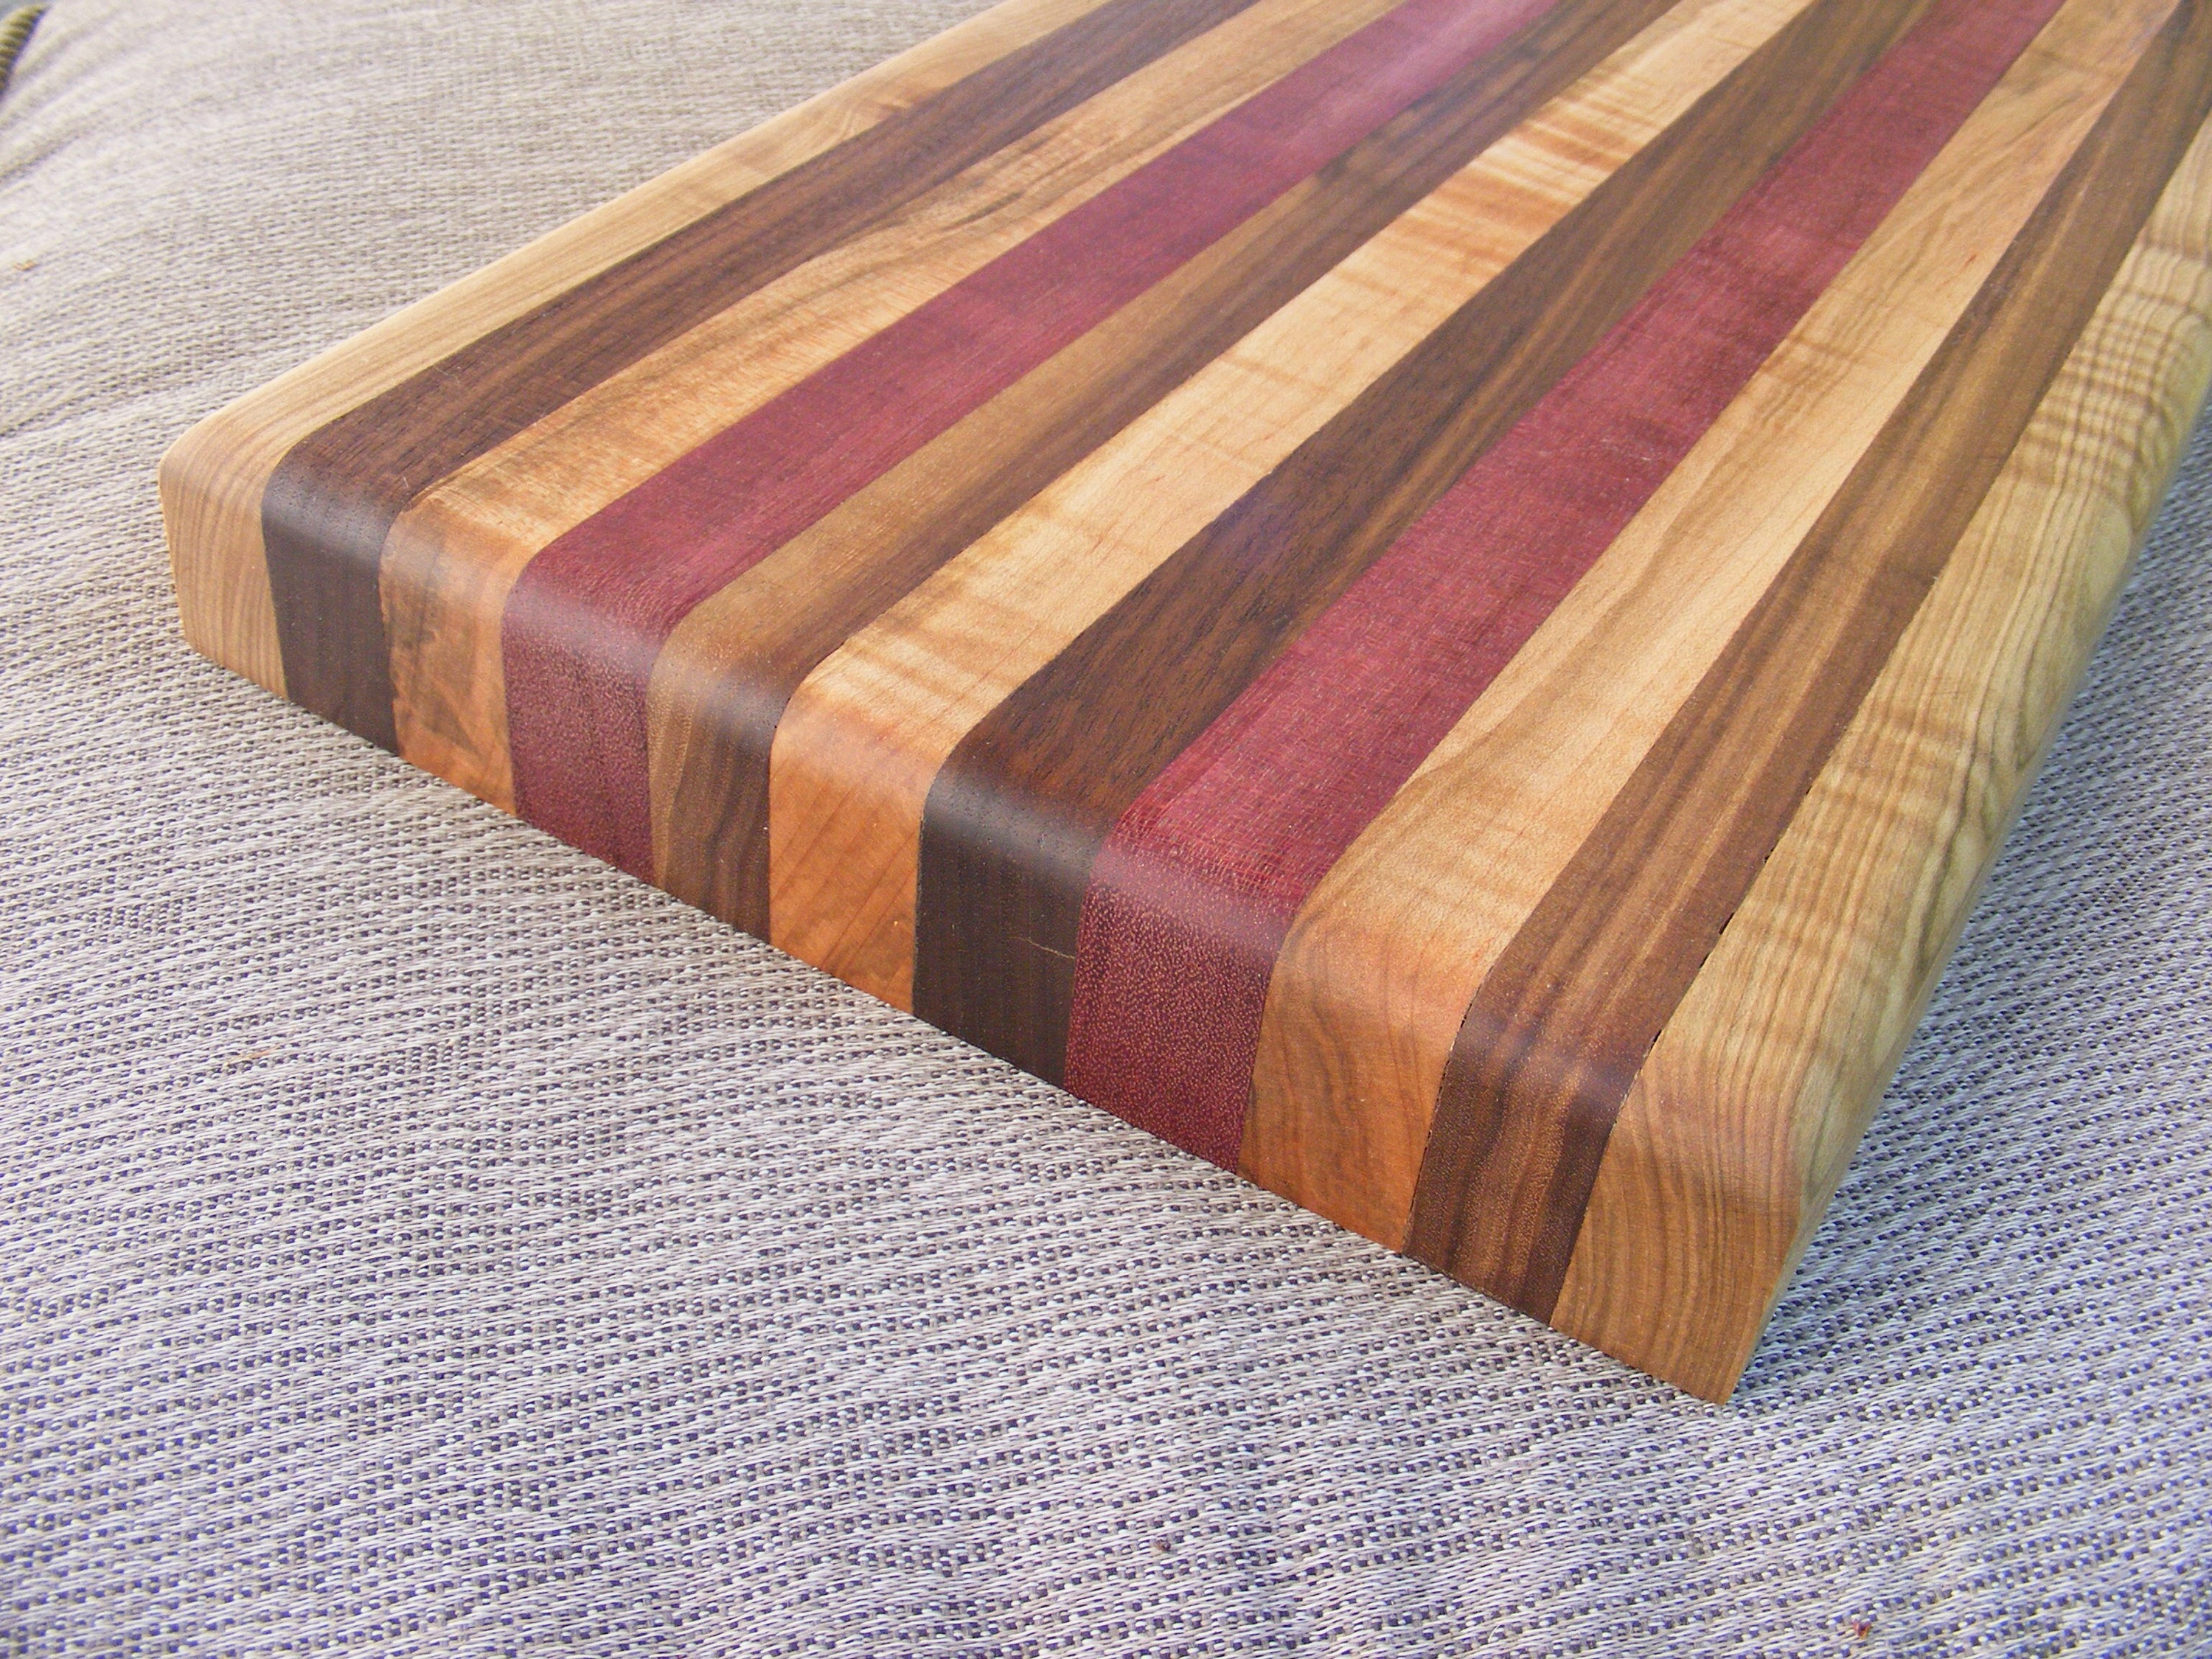
Choose a design that matches your style and skill level. Simple stripes or blocks work well for beginners. More complex patterns like checkerboards or zigzags suit advanced makers.
Choose Your Wood Types
Select hardwoods that contrast in color and grain. Maple, walnut, and cherry are popular choices. Mixing light and dark woods creates a striking pattern. Avoid soft woods that can damage knives or wear quickly.
Plan Your Layout
Sketch your design on paper or use design software. Decide the width and length of each wood strip. Keep the pattern balanced and symmetrical for a neat look. Test your layout by laying out wood pieces before gluing.
Consider Grain Direction
Align wood grain to improve strength and appearance. Edge grain boards show long grain lines and are easier to make. End grain boards display the wood’s cross-section and last longer. Choose grain direction based on use and style preference.
Measure And Cut Precisely
Use accurate measurements for each piece. Cut strips or blocks with a table saw or miter saw. Consistency in size ensures a clean fit and strong glue joints. Sand edges smooth before assembly.
Glue And Clamp Pieces
Gluing and clamping the pieces is a crucial step in making a cutting board. This process holds the wood strips tightly together, creating a strong and stable board. Using the right glue and clamps ensures the board stays flat and durable over time.
Apply glue evenly along the edges of each wood strip. Spread it with a brush or a small piece of scrap wood for full coverage. Avoid using too much glue to prevent messy squeeze-out, but make sure every edge is coated.
Choosing The Right Glue
Use a waterproof, food-safe wood glue. This type of glue protects the cutting board from moisture and is safe for kitchen use. Avoid glues that contain harmful chemicals or are not water-resistant.
Clamping The Pieces Together
Align the glued pieces carefully before clamping. Use bar clamps or pipe clamps to apply even pressure across the board. Tighten the clamps just enough to hold the pieces firmly without causing damage.
Checking For Glue Squeeze-out
Inspect the edges for any glue that oozes out. Wipe off excess glue immediately with a damp cloth. This step saves time during sanding and keeps the surface clean.
Letting The Glue Dry
Leave the board clamped for at least one hour or as the glue manufacturer recommends. Avoid disturbing the board during this time. Proper drying creates a strong bond between the wood strips.
Flatten The Board Surface
Flattening the board surface is a key step in making a cutting board. A flat surface ensures the board sits steady and cuts are even. Uneven surfaces can cause knives to slip and lead to accidents. This process creates a smooth, safe board ready for use.
Prepare Your Tools
Use a planer, hand plane, or belt sander for flattening. Check that blades and belts are sharp. Dull tools can damage the wood or create uneven spots. Clean your workspace to avoid dust affecting your work.
Check For High And Low Spots
Run your hand over the board to feel bumps. Use a straight edge or ruler to spot dips or hills. Mark these areas lightly with a pencil. This helps target spots that need more attention.
Begin Flattening The Surface
Start with a coarse grit sandpaper or a planer. Remove wood from high spots slowly. Work across the entire surface evenly. Avoid focusing too much on one area to prevent creating new dips.
Fine Tune With Sanding
Switch to finer grit sandpaper for a smooth finish. Sand in the direction of the wood grain. This reduces scratches and leaves a clean surface. Use a sanding block for consistent pressure.
Final Surface Check
Use your straight edge again to verify flatness. The board should not rock or wobble. Smooth out any remaining rough areas. Your cutting board is now ready for the next step.
Cut And Shape Edges
Cutting and shaping the edges of your board gives it a polished look. This step also ensures safety and comfort during use.
Sharp edges can cause splinters or cuts. Rounded or chamfered edges feel smooth in your hands. It adds style and improves durability.
Mark The Edge Profile
Choose the edge shape you want. Common profiles are square, rounded, or beveled.
Use a pencil and ruler to draw the shape on the board edges. Clear markings guide your cuts accurately.
Cut The Edges
Use a router or jigsaw to cut along your pencil lines. Move slowly for clean, even cuts.
Wear safety glasses and keep your hands away from the blade. Take your time for precise results.
Sand The Edges Smooth
Start sanding with medium-grit sandpaper to remove rough spots and tool marks.
Switch to fine-grit sandpaper for a smooth finish. Sand all edges evenly for a consistent feel.
Check For Sharp Spots
Run your fingers along the edges to find sharp or rough areas.
Sand those spots again until the edges feel soft and safe to touch.
Credit: www.homedepot.com
Sand For Smoothness
Sanding is a key step to make your cutting board smooth and safe. It removes rough spots and sharp edges that can hurt hands or dull knives. Sanding also prepares the wood for finishing, helping the oil or wax soak in evenly. Smooth surfaces prevent food particles from sticking, keeping the board clean and hygienic.
Start sanding with coarser grit sandpaper to level the surface. Then use finer grits to polish the wood until it feels silky. Take your time and sand all sides, including edges and corners, for a consistent finish.
Choose The Right Sandpaper Grit
Begin sanding with 80 or 100 grit sandpaper to remove glue and uneven spots. Next, use 150 grit to smooth out scratches. Finish with 220 grit or higher for a soft, smooth feel. Using the correct grit order avoids deep scratches and saves time.
Sanding Techniques For Best Results
Sand along the wood grain to avoid scratches. Use a sanding block or an orbital sander for even pressure. Lightly sand edges and corners with your hand or a folded piece of sandpaper. Clean dust from the board between sanding steps to see progress clearly.
Check For Smoothness And Repeat If Needed
Run your hand over the surface to detect rough patches. Look for any glue spots or uneven areas that need more sanding. Repeat sanding with finer grit until the board feels perfectly smooth. Proper sanding gives your cutting board a professional look and makes it safe for daily use.
Apply Food-safe Finish
Applying a food-safe finish is the final step in making a cutting board. It protects the wood from water, stains, and bacteria. The finish also enhances the wood’s natural beauty and grain. Using the right finish keeps your board safe for food contact and extends its life.
Choose The Right Food-safe Finish
Pick a finish that is non-toxic and safe for kitchen use. Mineral oil is popular because it soaks into the wood and repels moisture. Beeswax mixed with mineral oil adds extra protection and a smooth feel. Avoid finishes with chemicals or solvents that can be harmful.
How To Apply The Finish
Start with a clean, dry cutting board. Use a soft cloth or brush to apply the finish. Rub the oil or wax in a circular motion until the wood absorbs it. Let it sit for at least an hour or overnight for best results. Wipe off any excess finish before use.
Maintain Your Cutting Board Finish
Reapply the finish regularly to keep the board protected. Do this whenever the wood looks dry or dull. Clean the board gently with mild soap and water, then dry it well before finishing. Proper care prevents cracking and warping.
Maintain Your Cutting Board
Maintaining your cutting board is essential for its longevity and hygiene. Proper care keeps the wood strong and looking good. It also prevents bacteria from growing in cracks or cuts. Follow simple steps to keep your board safe and functional for years.
Cleaning Your Cutting Board
Wash your cutting board with warm, soapy water after each use. Avoid soaking it in water to prevent warping. Use a sponge or cloth to clean all surfaces thoroughly. Dry the board immediately with a clean towel.
Oiling And Conditioning
Apply food-grade mineral oil to your cutting board regularly. This oil protects the wood from drying out and cracking. Rub the oil into the surface using a soft cloth. Let it soak in for a few hours or overnight. Wipe off any extra oil before use.
Removing Stains And Odors
Use coarse salt and lemon to remove stains and odors. Sprinkle salt over the board and rub it with half a lemon. Let it sit for a few minutes, then rinse with water. This natural method cleans and freshens the wood without harsh chemicals.
Sanding For Smoothness
Sand your cutting board to remove deep cuts or rough spots. Use fine-grit sandpaper and sand evenly across the surface. After sanding, clean the dust off and reapply oil. This restores a smooth, safe cutting surface.
Frequently Asked Questions
What Type Of Wood Is Best For Making A Cutting Board?
Hard maple, walnut, and cherry are best for cutting boards. They are dense, durable, and resist bacteria. Avoid softwoods or open-grained woods. Use food-safe finishes to protect the wood and maintain hygiene.
What Kind Of Oil Do You Use For A Wooden Cutting Board?
Use food-grade mineral oil or butcher block oil to treat wooden cutting boards. These oils protect and condition the wood. Avoid cooking oils, as they can turn rancid. Regular application keeps the board water-resistant and extends its lifespan. Apply generously and wipe off excess after soaking.
What Is The Best Material For A Cutting Board?
The best cutting board materials are dense hardwoods like maple, walnut, or cherry. They resist bacteria and last long. Avoid softwoods or open-grained woods that trap food particles. Finish with food-safe mineral oil for durability and safety.
Can You Make Any Wood Into A Cutting Board?
Not all wood suits cutting boards. Choose dense, tight-grained hardwoods like maple, walnut, or cherry. Avoid softwoods and open-grained woods to prevent bacteria buildup.
What Wood Is Best For Making A Cutting Board?
Hardwoods like maple, walnut, and cherry are ideal for cutting boards. They are dense, durable, and resist knife marks well. Softwoods can easily get damaged and are not food safe.
Conclusion
Making your own cutting board is simple and rewarding. Choose strong hardwood like maple or walnut. Cut, glue, and sand carefully for a smooth surface. Finish with food-safe oil to protect the wood. This project improves your skills and gives you a useful kitchen tool.
Enjoy the process and pride of a handmade cutting board. Keep it clean and oiled for long-lasting use. Try different wood patterns to create a unique design. Have fun crafting and cooking with your new board!